Posted Wednesday, 8th June 2011 under Guides and FAQs
Comments Off on Sega Ages 2500 Phantasy Star: Generation 1 FAQ
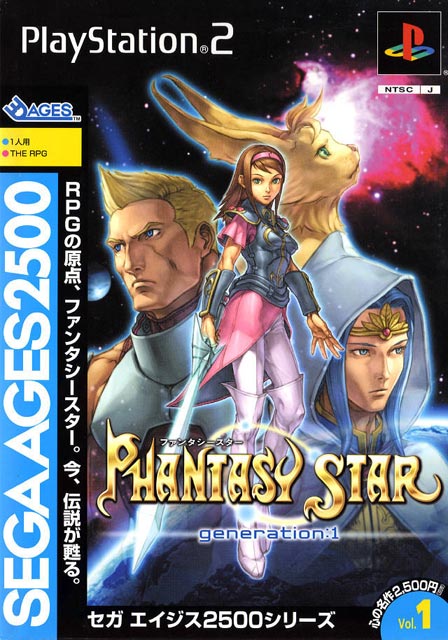
There’s no such thing as too much love for Phantasy Star. For this FAQ, I’ll list all the resources I used to finish Phantasy Star: Generation 1, the Sega Ages 2500 remake of Phantasy Star, as well as some hints that the existing guides and FAQs have missed.
First up, your essential resources:
- Omar Pérez’s Mini-FAQ (GameFAQs): This is your base for the game, as it contains the information to get most of the core items, the sequence to play through the game and all sorts of other goodies. The content up until you go to Dezoris can be a bit light at times (more on filling those gaps is noted below), but once you jet off to the ice planet, it is 110% rock solid. I would not have been able to finish this game without his guide, especially with his constant plugs to use the Collaboration system 🙂
- Bokokun’s Lists FAQ (GameFAQs): It’s in shift-JIS, so make sure you have Japanese fonts installed. I can read hiragana, katakana and a bit of kanji, so Bokokun’s guide was a godsend in filling in the gaps when my brain wouldn’t articulate everything correctly 🙂 Especially noteworthy is his guide to the Collaboration system, which saved my bacon on the final boss fights.
- Wolfgang Landgraf’s Phantasy Star: Generation 1 guide. I used his Phantasy Star: Generation 2 guide extensively when I played through that a few years back, and once again he comes to the rescue with detailed maps on every dungeon in the game, translations of items in the store, general hints and full overland maps – his maps of Dezoris were amazingly helpful as I kept getting lost 😉
- Dark Vortex’s (Quan Jin’s) Phantasy Star FAQ (Sega Master System; GameFAQs). For the areas where Omar’s guide skimmed over pretty quickly, all the necessary info was neatly tucked away in Dark Vortex’s FAQ for the original Phantasy Star on the Master System. To be honest, any of the FAQs for PS1 would suffice, I just happened to prefer Dark Vortex’s.
The other thing I did to make life easier was to hack my levels to save on grinding – in the first instance, I bumped Alis to level 60-ish; later on when I amassed the rest of the party, I was pleased to see they all leveled up with Alis even when they weren’t in your party. Later into the game, I noticed in a few battles things were getting a little dicey, so I hacked my characters again to level 95 (or 9,000,000 EXP!) to finish off the game. You’re welcome to grind to your heart’s content, but I’m time poor and as much as I adore the early Phantasy Star games, PS1 and PS2 are too grind-heavy these days. I’ve already done the hard yards back in the day, so I was lazy with the remakes 😛 I’ll be posting an updated guide on hacking the experience levels of the other characters in the future, and will look at uploading a guide to GameFAQs as well at some stage.
So, using all those documents above, you’ll be relatively set. I’d use Omar’s guide as the base, use Bokokun’s guide to help with identifying items and spells, Wolfgang’s guide for dungeon maps and fill in the gaps with Dark Vortex’s FAQ. There are still a few tricks that may step you up, so apart from the obvious (talk to everyone two or three times to exhaust the conversation chains, consult often, keep track of locations being mentioned in green [a working knowledge or katakana and hiragana helps, otherwise use Bokokun’s guide], etc), here are some situation specific details I noted during my playthrough:
Naula Key (Naura no kagi)
Talk to the man at Eppi (village leader), get Hashim’s Key (Hashim no kagi), talk to the village leader again, consult (L1), goto Parolit, talk to Mary (Meari-), and you should get the Naula Key (Naura no kagi) to enter Naula Cave.
Toriada Key (Toriada no kagi)
The Toriada Key (Toriada no kagi) is in the brown house in Gothic. Use it to enter Toriada Prison.
Bortevo Key (Bartevo no kagi)
To obtain the Bortevo Key (Bartevo no kagi), in Bortevo go to the top-right house, talk to Garingu and you should get the Bortevo Key (Bartevo no kagi). Consult a few times prior to getting it as I remember Myau mentions Garingu.
Hapsby
After obtaining the polymetal, you’ll find Haspy by searching the bottom-right house in Bortevo.
Casba Dragon
This one drove me nuts, so here’s how I got the dragon to appear in the dungeon. Goto Casba, talk to the people in there, especially the girl Natalia (Nataria), consult, then goto Uzo and talk to Vivian (Bibian), consult, talk to the rest of the townspeople in Uzo, head back to Casba, talk to everyone and by now you should be getting plenty of people talking about the Blue Dragon in the dungeon. Consult, save then head back into the dungeon, and he should be there. Remember to head to Bortevo afterwards to grab the hovercraft.
Hovercraft
Head to the building next to the save game panel and search it – Hapsby will nerd it up and you can jump into it by pressing R1 when you’re next to the water (saves going into your inventory to active it every time).
Abion/Forgotten Tower and Medusa’s Tower
I found that I did these the opposite order that Omar’s FAQ suggests you do them in owing to what my characters were talking about when using the consult command. I did Abion/Forgotten Tower first and tackled Medusa’s Tower second. I never got around to doing Jara Cave 😛
Aukuba
Omar notes Aukaba as Twintown; doesn’t really matter, but when all my characters started talking about Aukbara no machi, it confused the buggery out of me. Having only played through Phantasy Star on the SMS once, I had a d’uh moment when I arrived and realised they were one and the same. Go me!
Gaining entrance to the Guaron Morgue
I can’t take credit for this one – Busterbeam over on the GameFAQs board pointed this out ( the original thread is here). To gain entrance to the Guaron Morgue, here’s the full list of what I did: I talked to the two Head Dezorians in Aukuba (they’re in red outfits, each in their own house either side of the town entrance), consulted, went to Guaron, got denied twice, consulted, returned to Aukuba, talked to the Head Dezorian on the left, consulted, returned to Guaron Morgue, and was permitted entry. Thanks Busterbeam!
Getting past the pit in Guaron Morgue
Use Myau’s Report techniqe (also referred to as his trap disarm spell) just prior to the pit in Guaron Morgue that leads yo the Laconian armour. You’ll go straight on top of it and won’t swear at the TV like I did three times before I realiased you had to use his technique 😛
Ice Dungeon gibberish
This one’s an anomally – using consult after finishing the Guaron Morgue and before heading into the Ice Dungeon, at the end of a conversation Alis exclaims “Ha-a-a [X] [Triangle] [Square] [O] [Triangle] [Square] [O] [X] [X]”. I’ve no idea if this is a fancy cheat or code, but thought I’d note it down regardless.
I think that covers it – again, huge props to the authors of those FAQs, I wouldn’t have even hoped to have made it through Phantasy Star: Generation 1 without your help!