Overhauling the Sega Astro City – Part 12, replacing the monitor

Of all the aspects of the overhaul, replacing the monitor was the one I was dreading. The big 29″/68cm tubes are heavy, you have to be careful discharging the tubes and I was worried about scratching the new screen 🙂 To my surprise, it actually wasn’t too tricky.

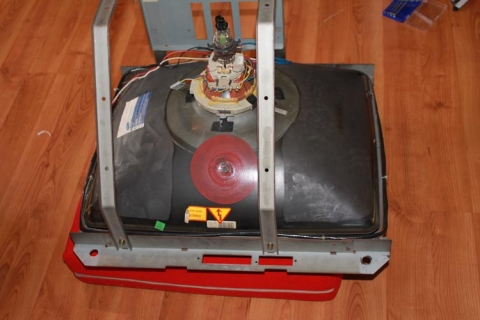
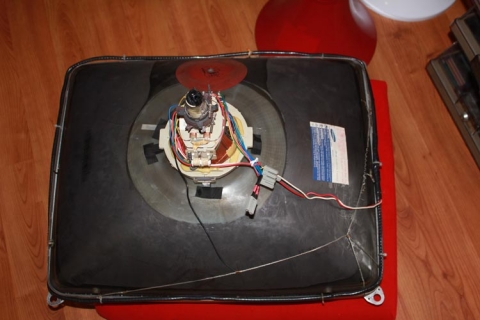
First up, the monitor (i.e. tube, chassis and mounting cage) had already been removed from the cabinet while I was rewiring it. I discharged the tube safely, grabbed a cushion off a nearby couch, and gingerly laid it face-down on the cushion so I could work on the cage and chassis without worrying about cracking the tube:

After using my capable screwdriver that will allow the shaft to bend at 45° and 90° angles and treating it like a wrench with a big phillips head screwdriver tip, I managed to remove the cage from the tube:

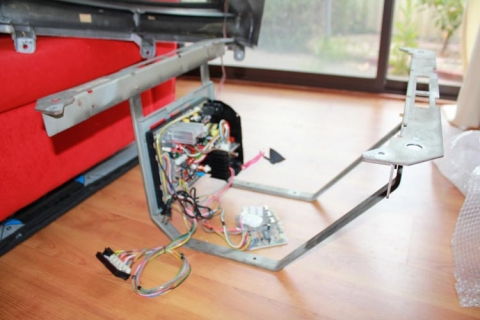
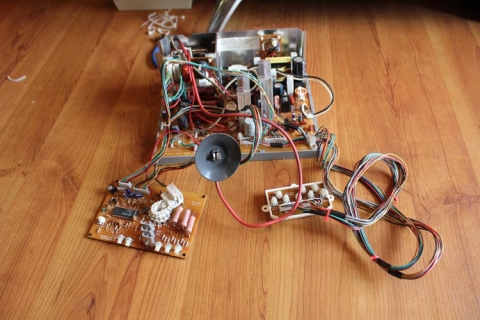
With that finished, here’s the chassis I removed the chassis from the cage before starting on the tube:

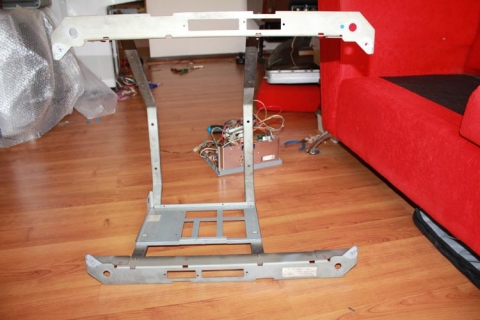
This left me with a nice empty cage to work with:

Next up, I grabbed the fresh, shiny Universal Chassis I ordered a while back for this job. I sourced the chassis from Jomac, who happen to be an amazing team to work with, provide expert advice and offer extremely competitive prices (in other words, they come extremely highly recommended). I then mounted the chassis to the cage like so:

Easy.

Next up came decasing the tube. I was able to source a Teac 68cm TV circa late-90s/early 00s from my parents that was perfect for the job – 68cm tubes are an almost 1:1 replacement for 29″ arcade tubes and are amazing quality. Paired with a Universal Chassis solution from Jomac, and I had a dual-resolution 15k/24k monitor for the price of a chassis, no need for factoring massive costs for sourcing arcade tubes.

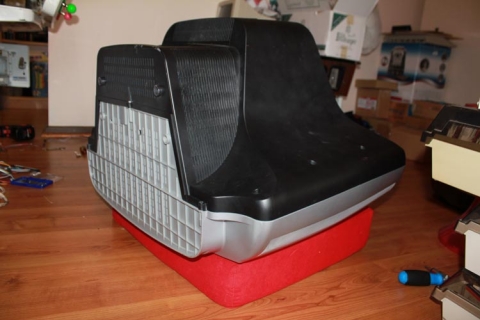
Anywho, the tube was safely discharged and I repeated the same process as before – gingerly lower the whole TV onto the cushion, then begin de-casing it:

A bit of patient gruntwork later, and I’m left with the tube on the cushion awaiting the cage:

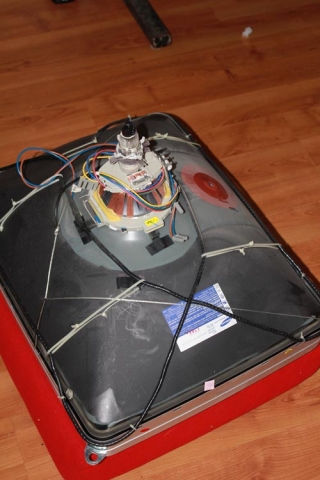
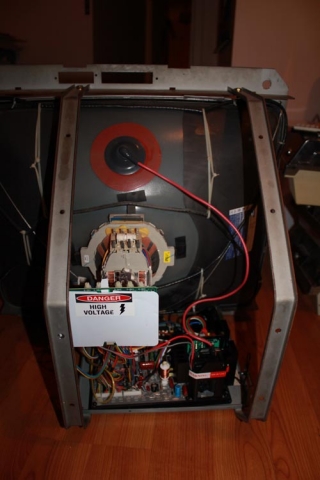
Simply mount the tube to the cage very carefully, ensure all the connections are solid, and I went about wiring up the degaussing coil, yoke connections, mounted the neckboard and ensured all the ground connections were fitted. This is the end result:

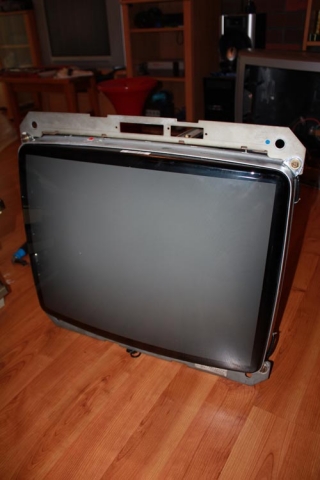
Front –

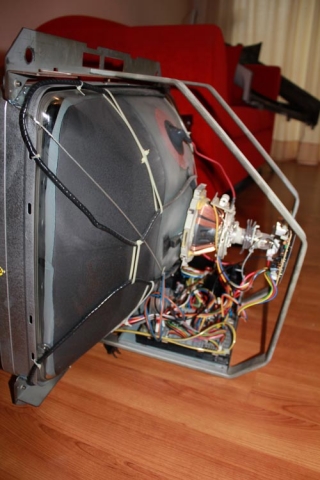
Side –

Rear –

The whole process probably only took 30-45 minutes, including discharging the tubes again at the start of the session – I had previously discharged them the day before and did it twice during the session to be extra careful with them.

All that’s left now is to plonk the monitor back in the cabinet, fit the front cover including the bezel, connect all the wires and run a smoke test, then the cabinet will be complete. Expect that report in the following (and hopefully final!) part in this series 🙂

As noted before, posts on the refurb are being done ad-hoc, so to keep track of the whole project, just use the Sega Astro City Overhaul tag, as the whole series will be added to it over time.
Overhauling the Sega Astro City – Part 5, roundup

Continuing on from part 4 of this series, let’s move on to part 5 – a short summary!

With all the groundwork done, I’ve whipped up a short summary noting my “to-get” list:

Item Comments Price
Terminal block 2x 12-way 30A blocks, dividable $5.70
3m AC cabling For new AC wiring $7.50
General purpose hook up wiring Better quality wiring for general purpose stuff $4.95
New JAMMA adapter Replace existing, tired JAMMA cabling $19.95
Naomi Molex adapters for: (a) male Model 2/3 adapter, (b) male JAMMA, (c) male and female for 12v/GND lines for accessories Naomi molex plugs included with PSU; if can’t get female Naomi molex plugs, run an extra 12v and GND run from each adaptor to a more generic molex, and use that to hook up to a molex off the 12v patch bay $15.00
Molex adapters for chassis and fluro To be determined $15.00
2 x red SPST 12v switch Used to power fan/negatron $7.90
1 x green SPST 12v switch Used to power audio $3.95
1 x 3PDT switch Audio source switch $7.95
2 x 120mm fan guards For protecting against injury on 12v fan $9.90
Negatron Used to obtain -5v on the JAMMA harness $25.00
Stereo audio volume controller Fit to outside to replace current controller, runs off final volume output $21.95

That’s my theoretical list with pricing, which may or may not change over time – these posts are a little retrospective, so more updates will come as they happen. Note that this list doesn’t cover the big purchases, which are the Sun PSU and the chassis from Jomac, this is more the ancillary goods to help get everything together.

Once everything’s been gathered and finalised, I’ll then prepare a project timeline noting what needs to be done in the correct order to remove the old components, fit the new ones, test, and finalise the project. We can only hope there isn’t too much scope creep 🙂

So that’s part 5 – part 6 and onwards will be ad-hoc updates, so to keep track of the whole project, just use the Sega Astro City Overhaul tag, as the whole series will be added to it over time.
Overhauling the Sega Astro City – Part 3, monitor replacement

Continuing on from part 2 of this series, let’s move on to part 3, which is probably the most expensive one – replacing the monitor in my Sega Astro City.

The problem I’ve had for a while now has been with some persistent issues regarding convergence and clean lines on the existing monitor, but the main issue I’ve had is knocking out some nasty interference on the tube from what looks like some omnipresent unshielded speakers. Despite attacking it with a degaussing wand, I haven’t been able to permanently shift it, and talking to a few ops and techs, I’ve been told the tube’s probably on the way out. Given the machine’s originally from Japan (though the tube’s been changed since it made it’s way to local shores I’d hazard at a guess, given the dodgy chassis driving the tube before I switched to a genuine Pentranic dual-resolution chassis) and has made it’s way across the country, this isn’t surprising.

So, what to do? I floated the idea of grabbing a big 29″ tri-res tube and use that, but the issue with going this way are that 15k games (which are the majority of arcade games out there) generally look a bit rubbish on most tri-res chassis’ compared to a 15k or 15k/24k chassis, and the cost of the tube (well, tube + postage) is enormous. So, what to do?

After asking around at Aussie Arcade, I found out that Jomac can do a 29″ universal chassis that can be used on old TV tubes. So, given a 68cm TV will suit a 29″ tube frame, the prospects get much better. Given the relatively negligible cost of CRTs at the moment (a lot of my fellow arcade fanboys at AA are pros at nabbing working tubes off the side of the road during hard rubbish!), I managed to nab one for pretty much nothing that’s in great physical condition and a prime candidate for plonking into my cab. All I need now is a uni chassis to suit (I’ve already checked in with Jomac and he’ll be able to sort me out), and I’ll be fine to go. Given I’ve already had plenty of practice hooking up chassis components to tubes when my old generic chassis died last year (including safely discharging the tube), the job shouldn’t be too tricky.

So, this means I’ll be able to swap out the old tube for a relatively new one, pair it with a nice 15/24k universal chassis, and be up and running with a great little setup. Definitely makes for an easier and more cost-effective way of swapping tubes around, and will leave me with a working 15/25k Pentranic CH-288 chassis I can either hold on to, or sell off to offset the cost of the new chassis.

So that’s part 3 – part 4 will deal with more scope creep, this time involving the addition of some old PC parts.

To keep track of the whole project, just use the Sega Astro City Overhaul tag – the whole series will be added to it over time.