Modding March, update 2

modding-march-2012-arcade-cp

More modding news!

I’ve finished off the tweaks to my Astro City’s control panel, and I can now swap in/out P1 and P2’s respective fourth button off the JAMMA harness, handy for my neglected MVS (which is now in my cab, giving Marvel vs Capcom a much deserved rest).

I’ve also disassembled my XB360 to get the model number of the DVD-ROM unit (which I could have simply ascertained by checking the cable off the front with the faceplate removed, but I figured I needed to disassemble it anyways so went ahead with it regardless), added a bit of hot glue to my SMS2 to reinforce one of the screws holding the dual-mono audio plate on the rear of the machine and also took apart my A500 to remove the floppy disk drive as I’m looking at grabbing a HxC Floppy Drive emulator and mounting it internally on my system (something I think Old School Game Blog would appreciate given his huge knowledge and appreciation for Commodore computers!).

In addition, I’ve had confirmation that the replacement Saturn cart slots are on their way, and the 10mhz oscillator for the SMD is in the post as well. If all goes well, I should be able to get the whole list done within a couple of days of April 🙂

I’ve also started thinking of tidying up a couple of other console mods – fellow modder Mamejay has shared a circuit for getting extremely nice composite and s-video off a PAL Atari 2600 (adapted from an A2600 Jnr mod he’s been doing for a while), so I’ll grab some CD4050s to give it a whirl. I’m also toying with the idea of overclocking my PAL and Japanese N64s since I still have a couple of switches in my stash.

So, the revised list (which will take me into April) is as follows:

  • Sega Mega Drive 10mhz overclock
  • Sega Saturn cartridge slot transplant
  • Atari 2600 AV mod
  • N64 overclock (PAL and Japanese consoles)

With all of those done, I’ll definitely have caught up on my backlog!

I’ll be looking forward to reporting back on when these are finished, as it means I can get started on two larger projects I have planned for this year, but details of those are to come down the road!

Overhauling the Sega Astro City – Part 11, rewiring the cabinet

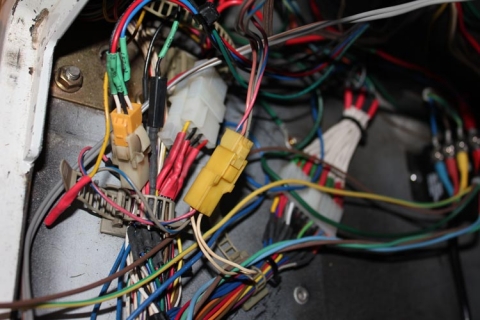
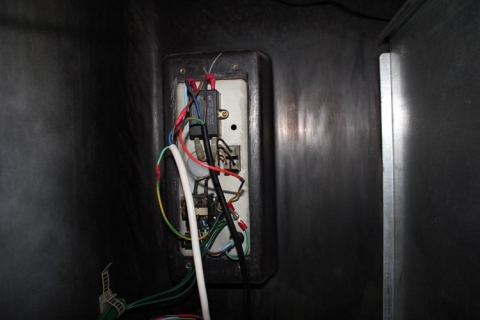
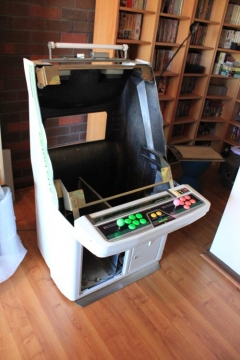
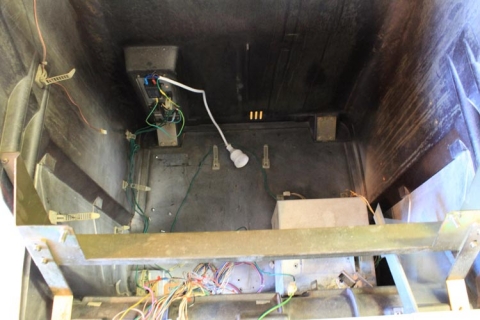
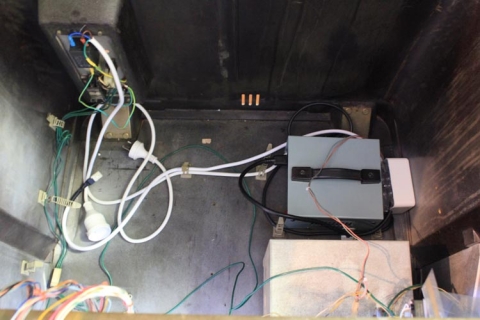
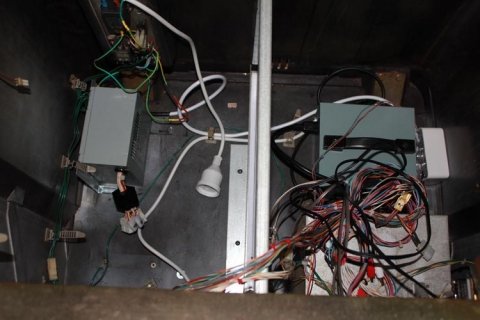
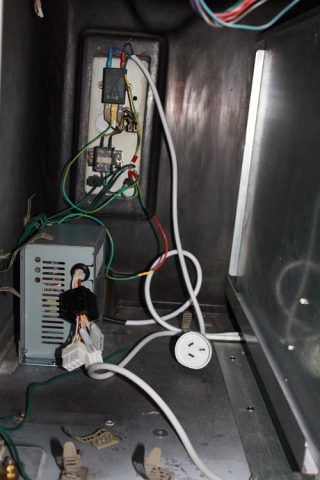
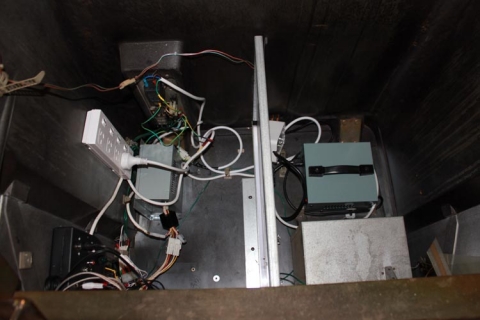
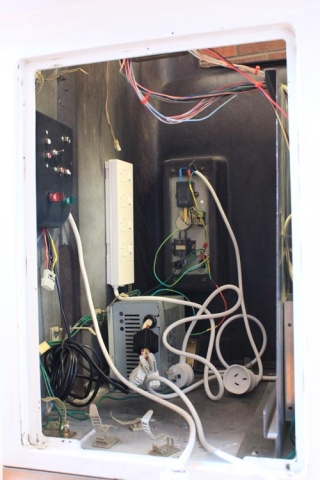
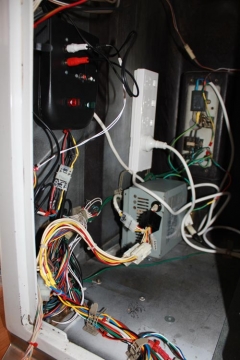
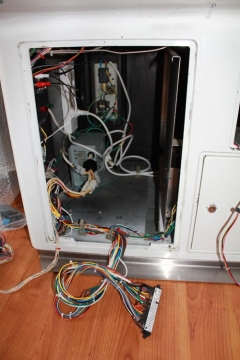
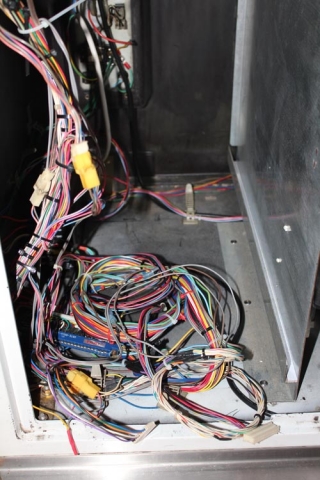
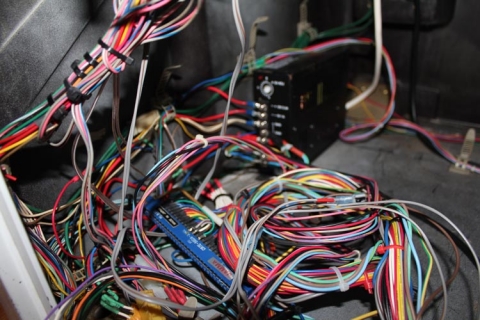
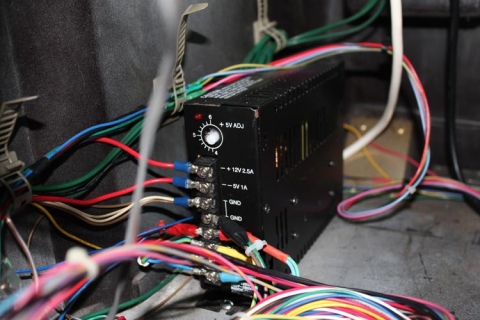
This one is best told in pictures. Let’s start with the before:

Looking inside the cabinet from the outside:

Closer up:

Power supply in focus this time:

Molex connections galore:

And the AC wiring, complete with heatshrink tubing and solder for the spliced connections:

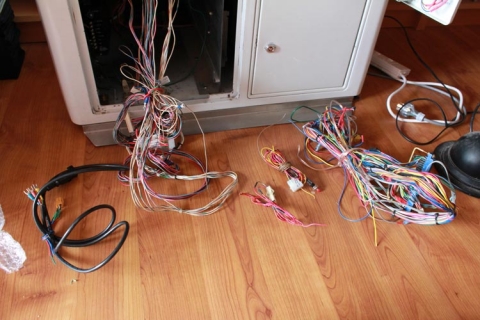
Here’s the aftermath, with all the control panel wiring intact (since it will be reused), and all the excess wiring removed:

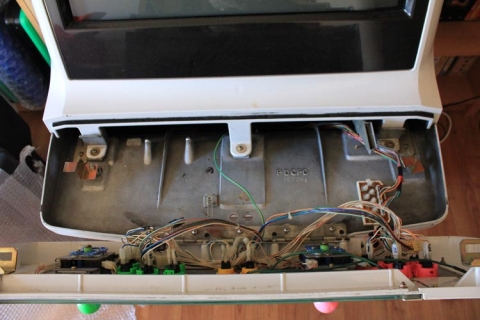
And for the sake of completeness, here’s the control panel without the bracket that houses all the molex connectors:

Now that all the wiring is out, next came the step of stripping everything out of the cab – the outer layers were removed that hold the bezel and speakers, exposing the fluro tube, and the monitor in its entirety (cage included) was also removed. To open up the insides for working, I also removed the partition that holds the PCB holder and separates the two halves of the cab. It really is looking like a shell now.

So, let’s start the refit – here’s a shot of the inside of the cab with only the new AC wiring present, with everything terminating to a female socket for ease of use:

Next up, add the step-down transformer to the partition to the right:

Add the partition to the cab and mount the SUN PSU into place; it’s positioned to allow for thick PCB boards, the MAME PCB or CPS2 setups, but still retain access to the unit for adjusting DC voltages:

… and another shot:

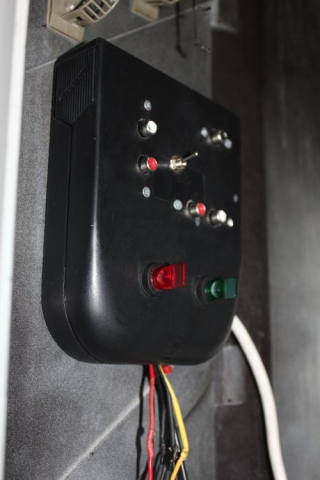
This next show shows the control box and the power board attached to the side of the cabinet:

The following closeups demonstrate when the control box and power board sit:

… and another:

… and another one:

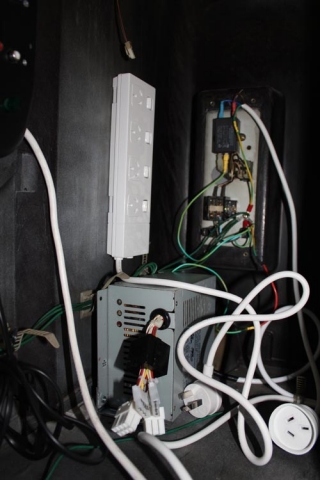
Almost there – the JAMMA harness has been added, molex connections are complete and cable-tied close to the frame, JAMMA harness is hooked up and some RCA connections have been added for the output on the control box:

And there we go – all finished and much neater than before!

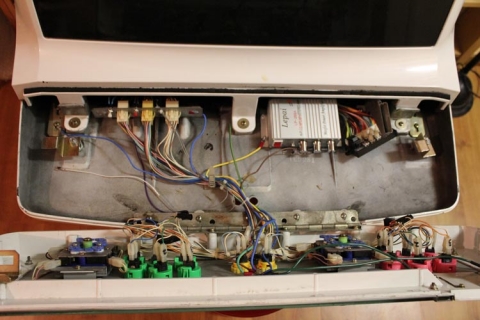
That takes care of the cabinet, but what about the control panel? We can’t forget that! Here’s a shot with the amp installed with all the wiring to the speakers and control box completed and the bracket re-installed:

And here’s the final shot with extra earth wiring grounding the monitor frame, amp, bracket and the coin slot chute/coin box:

Bit of a marathon run, but it came out really well. Next up – the new monitor!

As noted before, posts on the refurb are being done ad-hoc, so to keep track of the whole project, just use the Sega Astro City Overhaul tag, as the whole series will be added to it over time.
Overhauling the Sega Astro City – Part 9, customising the JAMMA harness

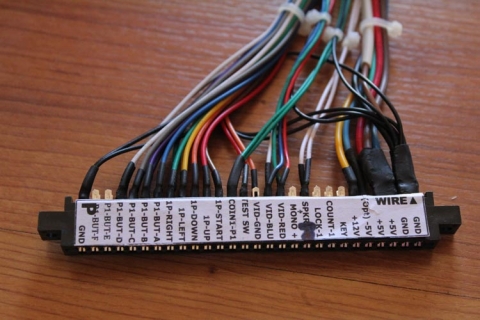
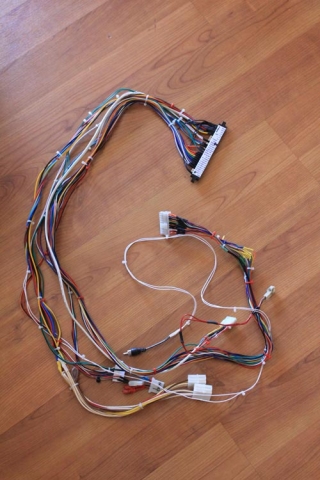
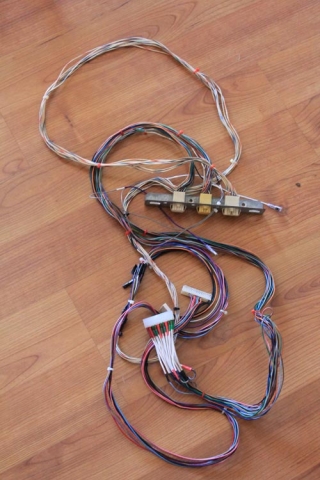
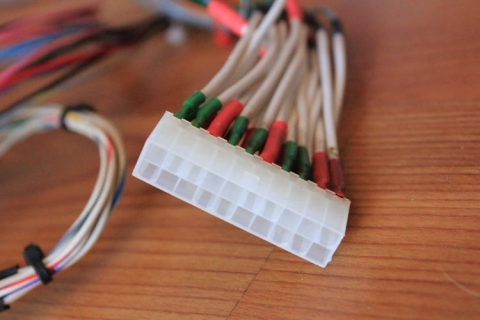
Because of the number of molex connections in the Astro City, and my desire to make this overhaul modular, I gave the JAMMA harness a hefty session or two with the soldering iron to get my desired outcome. The following is a full-length shot of the completed harness:

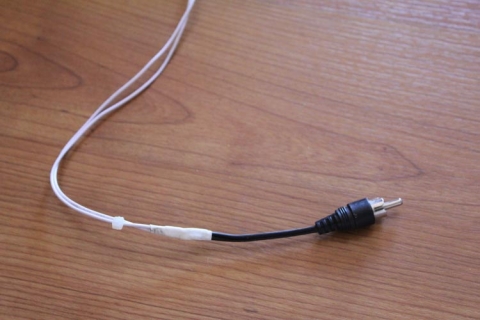
Audio mod

To fit in with the control box, the JAMMA harness takes the audio-out and puts it into an RCA connector. The positive or center pin takes the source from pin 10, or speaker +. The shielding/outer connection is actually a ground connection from any of the ground points on the harness. Astute observers will notice in the title pic that I have cabling coming from pin L, or speaker -, which I originally used in this mod, which was a bad idea! Had garbled audio and resetting PCBs. Thanks to Hewitson and the community at Aussie Arcade for that one, they steered me back in the right direction 🙂

-5v, ground and fan connections

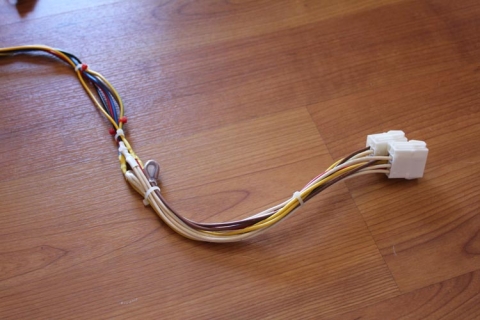
This molex connection takes the -5v, ground and fan 12v output from the control box and feeds it into the JAMMA harness. This fan connection is another molex connector (2-pin) so that a fan can be connected if necessary, and as all the power comes from a separate connection to the PSU, it’ll remain constant regardless of the setup.

JVS to JAMMA power modification

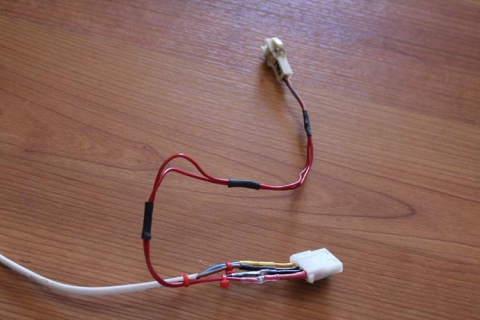
The PSU in the cab is a SUN PSU, so the power connections are JVS standard. To accomodate this, I hacked a spare JVS extension cable and connected the +5v, +12v and ground to the relevant connections, and beefed up the wiring on the harness. By default it only had a single wire for each of these connections, so I added three additional wires to the +5v to help with the load for power-hungry games. I terminated the 3.3v wires on the extension cables with heatshrink tubing to keep it electrically safe.

Test and service buttons

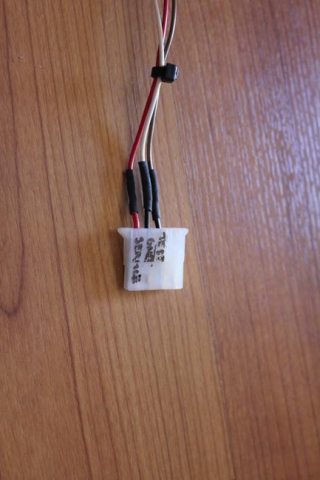
The test and service buttons are pushbuttons mounted underneath the control panel on Astro City cabs, so I terminated these connections along with a ground feed from the harness to allow easy connections. At the other end, I rewired the existing switches and cleaned them up so that they connected accordingly.

Coin slot connection

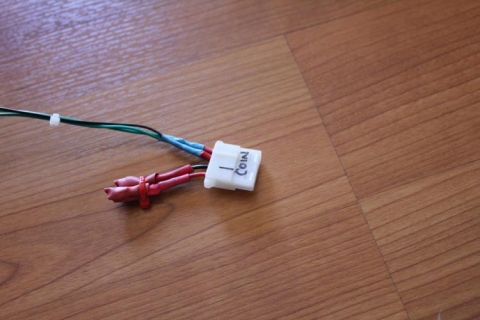
Similar to the service and test switches, the coin slot connection uses molex connections at either end. Inside the cab, the coin slot is also wired in parallel to a push button so that credits can be added without having to use coins. Handy, as I don’t have any ¥100 coins!

Controls

This was the biggest and scariest job – I chopped off the old molex connector after I manually used my multimeter to go through and check every connection on the molex connector, and its corresponding connection on the JAMMA harness. After doing this, I re-wired everything to the new JAMMA connector. The Astro City has every connection running through a couple of molex connectors, which then feed to a master connector that goes to the harness. The system worked, even if it was a little anally retentive, so I wanted to preserve this. This one connector took ages to put together, but I was really happy when it all worked 😀

Existing connections

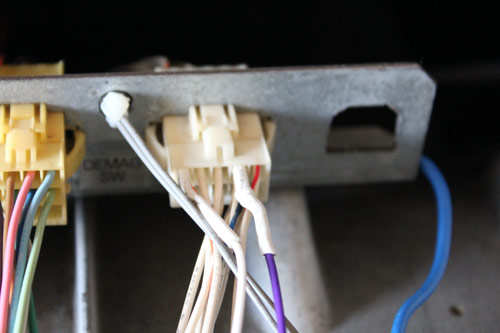
This is a long shot of the wiring mounted underneath the control panel – the metal bracket holds three molex connections – one for player 1 controls, one for player 2 controls and one for the JAMMA+ (buttons 4, 5 and 6) for both players. On the bracket are also mounting points for up to three small push buttons, labelled for test, service and degauss. As the degauss switch is on the external panel from the chassis, it isn’t used in my setup.

That final image is the female molex connector for the controls – a scary prospect to wire up! This feeds the P1 and P2 controls into the Astro.

The only other change I made was to have button 4 off the JAMMA harness for P1 and P2 be re-added into the master molex connector, and then have the female connector run extended lengths with quick-connects on that allow me to re-wire the control panel as required. This allows for quick and easy button changes when playing Neo Geo titles, for example.

As noted before, posts on the refurb are being done ad-hoc, so to keep track of the whole project, just use the Sega Astro City Overhaul tag, as the whole series will be added to it over time.
Overhauling the Sega Astro City – Part 6, audio update

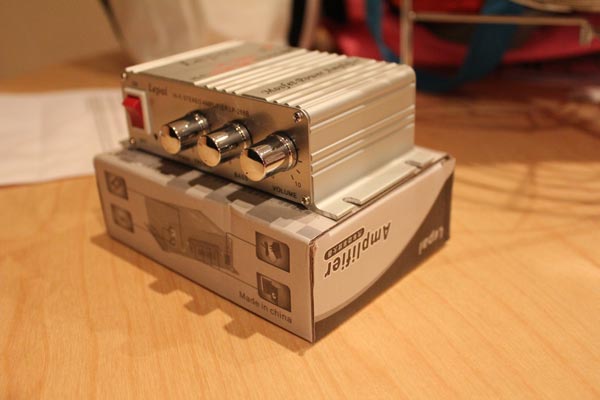
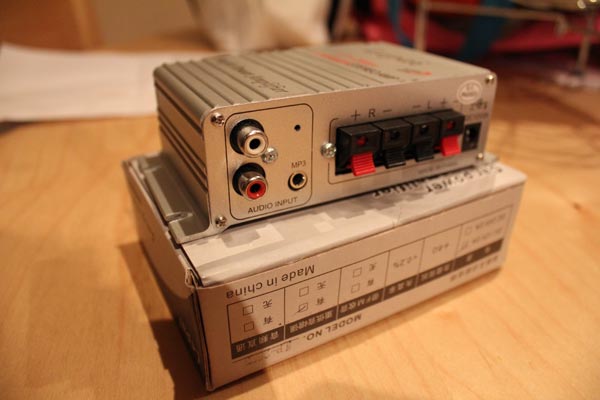
Well, the stereo attenuator I had planned for the Astro is no more – I can get mono attenuators, but not stereo with the level of performance I’m after. The solution? One of these:

Mini stereo amp - front

Mini stereo amp - rear

It’s a cheap mini stereo amp. In fact, it’s so compact, it’ll fit nicely inside the flip-up control panel on the Astro, so it’ll be easy to operate.

I wasn’t sold on these mini amps, but after reading some recommendations from other people who have used this same model on Aussie Arcade, I thought I’d give it a whirl. Considering the cost ($15!), I’m pretty happy with the outcome. Should work well to amplify both the mono amped output from the JAMMA harness, or the stereo line-out that needs amplifying.

As noted before, posts on the refurb are being done ad-hoc, so to keep track of the whole project, just use the Sega Astro City Overhaul tag, as the whole series will be added to it over time.
Overhauling the Sega Astro City – Part 5, roundup

Continuing on from part 4 of this series, let’s move on to part 5 – a short summary!

With all the groundwork done, I’ve whipped up a short summary noting my “to-get” list:

Item Comments Price
Terminal block 2x 12-way 30A blocks, dividable $5.70
3m AC cabling For new AC wiring $7.50
General purpose hook up wiring Better quality wiring for general purpose stuff $4.95
New JAMMA adapter Replace existing, tired JAMMA cabling $19.95
Naomi Molex adapters for: (a) male Model 2/3 adapter, (b) male JAMMA, (c) male and female for 12v/GND lines for accessories Naomi molex plugs included with PSU; if can’t get female Naomi molex plugs, run an extra 12v and GND run from each adaptor to a more generic molex, and use that to hook up to a molex off the 12v patch bay $15.00
Molex adapters for chassis and fluro To be determined $15.00
2 x red SPST 12v switch Used to power fan/negatron $7.90
1 x green SPST 12v switch Used to power audio $3.95
1 x 3PDT switch Audio source switch $7.95
2 x 120mm fan guards For protecting against injury on 12v fan $9.90
Negatron Used to obtain -5v on the JAMMA harness $25.00
Stereo audio volume controller Fit to outside to replace current controller, runs off final volume output $21.95

That’s my theoretical list with pricing, which may or may not change over time – these posts are a little retrospective, so more updates will come as they happen. Note that this list doesn’t cover the big purchases, which are the Sun PSU and the chassis from Jomac, this is more the ancillary goods to help get everything together.

Once everything’s been gathered and finalised, I’ll then prepare a project timeline noting what needs to be done in the correct order to remove the old components, fit the new ones, test, and finalise the project. We can only hope there isn’t too much scope creep 🙂

So that’s part 5 – part 6 and onwards will be ad-hoc updates, so to keep track of the whole project, just use the Sega Astro City Overhaul tag, as the whole series will be added to it over time.