Modding March, update 2

modding-march-2012-arcade-cp

More modding news!

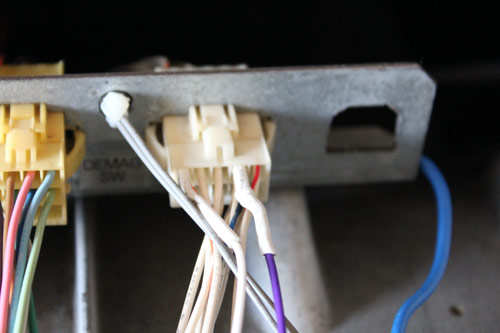
I’ve finished off the tweaks to my Astro City’s control panel, and I can now swap in/out P1 and P2’s respective fourth button off the JAMMA harness, handy for my neglected MVS (which is now in my cab, giving Marvel vs Capcom a much deserved rest).

I’ve also disassembled my XB360 to get the model number of the DVD-ROM unit (which I could have simply ascertained by checking the cable off the front with the faceplate removed, but I figured I needed to disassemble it anyways so went ahead with it regardless), added a bit of hot glue to my SMS2 to reinforce one of the screws holding the dual-mono audio plate on the rear of the machine and also took apart my A500 to remove the floppy disk drive as I’m looking at grabbing a HxC Floppy Drive emulator and mounting it internally on my system (something I think Old School Game Blog would appreciate given his huge knowledge and appreciation for Commodore computers!).

In addition, I’ve had confirmation that the replacement Saturn cart slots are on their way, and the 10mhz oscillator for the SMD is in the post as well. If all goes well, I should be able to get the whole list done within a couple of days of April 🙂

I’ve also started thinking of tidying up a couple of other console mods – fellow modder Mamejay has shared a circuit for getting extremely nice composite and s-video off a PAL Atari 2600 (adapted from an A2600 Jnr mod he’s been doing for a while), so I’ll grab some CD4050s to give it a whirl. I’m also toying with the idea of overclocking my PAL and Japanese N64s since I still have a couple of switches in my stash.

So, the revised list (which will take me into April) is as follows:

  • Sega Mega Drive 10mhz overclock
  • Sega Saturn cartridge slot transplant
  • Atari 2600 AV mod
  • N64 overclock (PAL and Japanese consoles)

With all of those done, I’ll definitely have caught up on my backlog!

I’ll be looking forward to reporting back on when these are finished, as it means I can get started on two larger projects I have planned for this year, but details of those are to come down the road!

Overhauling the Sega Astro City – Part 11, rewiring the cabinet

This one is best told in pictures. Let’s start with the before:

Looking inside the cabinet from the outside:

Closer up:

Power supply in focus this time:

Molex connections galore:

And the AC wiring, complete with heatshrink tubing and solder for the spliced connections:

Here’s the aftermath, with all the control panel wiring intact (since it will be reused), and all the excess wiring removed:

And for the sake of completeness, here’s the control panel without the bracket that houses all the molex connectors:

Now that all the wiring is out, next came the step of stripping everything out of the cab – the outer layers were removed that hold the bezel and speakers, exposing the fluro tube, and the monitor in its entirety (cage included) was also removed. To open up the insides for working, I also removed the partition that holds the PCB holder and separates the two halves of the cab. It really is looking like a shell now.

So, let’s start the refit – here’s a shot of the inside of the cab with only the new AC wiring present, with everything terminating to a female socket for ease of use:

Next up, add the step-down transformer to the partition to the right:

Add the partition to the cab and mount the SUN PSU into place; it’s positioned to allow for thick PCB boards, the MAME PCB or CPS2 setups, but still retain access to the unit for adjusting DC voltages:

… and another shot:

This next show shows the control box and the power board attached to the side of the cabinet:

The following closeups demonstrate when the control box and power board sit:

… and another:

… and another one:

Almost there – the JAMMA harness has been added, molex connections are complete and cable-tied close to the frame, JAMMA harness is hooked up and some RCA connections have been added for the output on the control box:

And there we go – all finished and much neater than before!

That takes care of the cabinet, but what about the control panel? We can’t forget that! Here’s a shot with the amp installed with all the wiring to the speakers and control box completed and the bracket re-installed:

And here’s the final shot with extra earth wiring grounding the monitor frame, amp, bracket and the coin slot chute/coin box:

Bit of a marathon run, but it came out really well. Next up – the new monitor!

As noted before, posts on the refurb are being done ad-hoc, so to keep track of the whole project, just use the Sega Astro City Overhaul tag, as the whole series will be added to it over time.

Finishing Street Fighter 2 Championship Edition on my Astro City!

I was doing some stuff on the PC I have setup in the back room yesterday, and since it was pretty mundane and took a while, I thought I’d have a crack at playing something on my Sega Astro City cab between processing tasks. Since Street Fighter 2 Championship Edition was in there, I thought I might as well give it a crack, and ended up finishing it! I’ve never done that on an arcade version of the game before (probably because I always ran out of credits or I was too busy playing vs another person), so it was pretty cool 🙂 I mean, the ending was pretty lame, but in a fun kind of way (if that makes sense!).

Funnily enough, I didn’t have much in the way of problems in beating the four bosses (Bison excepted – took a few goes to get that one), but got stuck on Honda and… possibly Guile. I’m hardly the world’s best player at the game, but I’m not too shabby either – with Honda, I couldn’t jump in to attack because he always got me with his standing fierce chopping strike thingo and was having trouble mixing up distances to avoid a few basic traps, and while I got close to beating Guile, always seemed to loose it towards the end.

So I cheated by queuing up the problem characters as player 2, beat them, then continued in single player mode – after you beat the character as 2P, you don’t have to beat them in the actual game itself. That’s a handy hint I remember from when I used to play it at the arcades, though I was normally so cheap I wouldn’t pay for someone else, just hoped that another player would drop by and pick a character I had trouble beating 😉

Anywho, enjoy the shaky cam photos below – I was trying to snap photos as fast as possible without dying or missing anything, hence the wonky shots of the ending dialogue… though to be honest, I don’t think there’s too much there worth writing home about 😉

Oh, and I reckon I need to pick up a fresh spring for the Sanwa stick on player 2 on the Astro City, it’s feeling a bit too loose and isn’t as tight as P1’s. The clips for the P2 start button are also wonky, so I might need to grab some fresh quick-connects and rewire them. I have to get some proper Sanwa-standard quick-connects for the extra Neo Geo wiring on my JAMMA harness anyways (I’m using some generic quick-connects on them at the moment, and they often come off in-game :P), so it might be convenient to grab a handful of those, some fresh springs and snag a new PSU and degausing wand at the same time if budget alows for it. Will add it to the “to-get” list 😀

In the meantime, enjoy the pics and commentary!