Posted Sunday, 11th August 2013 under Travel
Comments Off on Retro Otaku’s Japan travel tips
I don’t claim to be a guru about traveling over to Japan having only had the opportunity to visit last year for the first time, but figured I’d add something to the sea of information out there based on our experiences last year.
Language
Do not bark at people in English. While English is widely taught in school, it doesn’t mean everyone is suddenly completely fluent in it. In Australia most high school children learn a language, but that in no way guarantees they’ll be able to use it outside the classroom. If you’re traveling to Japan, read up on at least some useful phrases and grab an app for your smartphone/tablet or a pocket phrasebook so that you can express how amazing the ramen you just ate in a tiny neighbourhood eat-in really was. Japanese is built on phonetic patterns of vowels, and pay attention to softening said-vowels. Probably influenced by North American pronounciation, too many people seem inclined to harden their vowels when they speak the language – listen closely to when native speakers fire out the language and take some inspiration.
It probably won’t hurt to learn some hiragana and katakana as well (and if you’re feeling adventurous, add some kanji into the mix). Even if it’s just some basics – being able to read references to your choices of travel (100-yen shops, arcades [Game Centres], anime or manga stores, book shops, budo shops, ramen, takoyaki, okonomiyaki) will make it easier finding the places you always wanted to go visit and stumbling along other opportunities!
You’ll also find language will vary from location to location – Tokyo has a fair whack of English translations against its signage to make it easier to get around, though the further out you go it starts getting a bit more sparse (Ohta, where we visited the Sega building, didn’t have much English signage and both Miitaka and Takao were a bit limited in parts as well). We found that Kyoto needed a bit more attention when getting around in comparison, same with Hiroshima and Osaka. Don’t stress if you get lost though – the locals were always amazing when we asked for help, but just make an effort to meet them half-way by speaking a bit of Japanese 🙂
Food
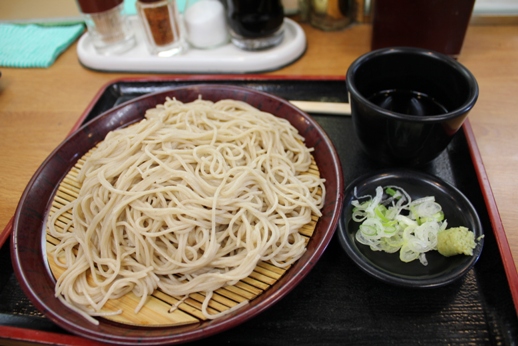
Get adventurous when you go to Japan! Ramen, udon, sushi, takoyaki, izakaya fare, okonomiyaki – these are just scratching the surface of all the amazing food over there! While it’s fun to take some time to check out the Japanese take on Western cuisine and take-out food, don’t chicken out and miss out on the fun stuff. One of the most memorable meals while we were away was hitting the neighbourhood soba place near Sega in Ohta – the meals were less than $3 each and it was absolutely delicious! Beer is also delicious off the tap in Japanese pubs despite being dirt cheap, and keep in mind that a number of places will actually have a vending machine out the front you use to select and purchase your meals (including note and coin slots), then you take a seat and wait for your meal to be finished up, collect and then return to your table to tuck in (or they’ll bring it out to you). Feel free to try some unusual gear from the armies of vending machines dotted around cityscapes too, and indulge in Japanese iced tea (hint: they’re not loaded with sugar).
Crime and safety
Don’t be an arsehole and you’ll probably be fine in Japan. The place was incredibly safe compared to home – people would leave handbags and shopping on tables in food courts when they went off to grab food from one of the outlets, prams were left loaded with personal goods outside stores and in amusement parks without the need for supervision. It was a nice change from back home. While we didn’t push any buttons while we were over there and can’t speak from experience about getting out of trouble, if you find yourself in a bad situation be nice and polite. Do not be a tool and get drunk, pick a fight with the locals while being filmed and getting it uploaded into YouTube.
Appearance
Gaijin could do a bit better in Japan. I’m not saying you need to set the pace when visiting the likes of Shibuya or Harajuku, but don’t dress like you’ve just woken up and walked out the door in a pair of baggy trackies (sweat pants to those not used to the Australian vernacular) and a t-shirt that’s seen better days, or making your way around the Tokyo train system dressed like you’re heading out to climb a mountain in a third world country (I’m not kidding – spotted a guy in the Shinjuku Station cranking a small backpack with several water bottles and hiking boots dressed in khaki like he was about to leave civilisation). I certainly didn’t set any precedents over there so it might seem a bit hypocritical, but it’s as good an opportunity as any to take some pride in your appearance 🙂
Mind, I’m doing this from my perspective as a guy – my gender limits me to being in the thick of things with the same appreciation for social norms as the opposite sex, but the etiquette research beforehand and what we noticed over there suggests that legs are fine to show off and crazy heels are an amazing idea, but perhaps be a touch conservative with your chest for the daily grind. Mind, a plunging v-neck on a guy sporting a hairy hipster chest won’t exactly win you any awards (you might be able to get away with it if you’re making a statement in Yoyogi Park on a Sunday with a crepe though!).
The art of walking
Did you know that we don’t know how to walk in public? I guess when you have that level of population density it comes part of the routine. It doesn’t mean that everyone walks fast, it’s just everyone knows how to bob, duck and weave through the human sea and be comfortable with cramming into the subway in sardine-like conditions (which, to be honest, isn’t as bad as it’s made out to be). Just be prepared to go with the flow – it’s a pretty interesting experience and when you get home (assuming you don’t live in a super high-density city, which we haven’t noticed in little old Australia), it adds some perspective!
Inside voice
My speaking voice is loud. In Japan, you don’t speak loudly, so be considerate of others, and if I can get into the habit of not being a noisy pain in the arse, anyone can. This is especially prominent on trains – even when they’re packed, they’re quiet, at least in most cases (they were a bit noisier in Osaka!). By extension, note the decorum in public when it comes to your phone as well – don’t speak on your mobile phone when on public transport, but texting, listening to music and gaming’s okay as long as you’re wearing earphones or headphones. At least that’s what we noticed in our travels and from all the stuff plastered around the place.
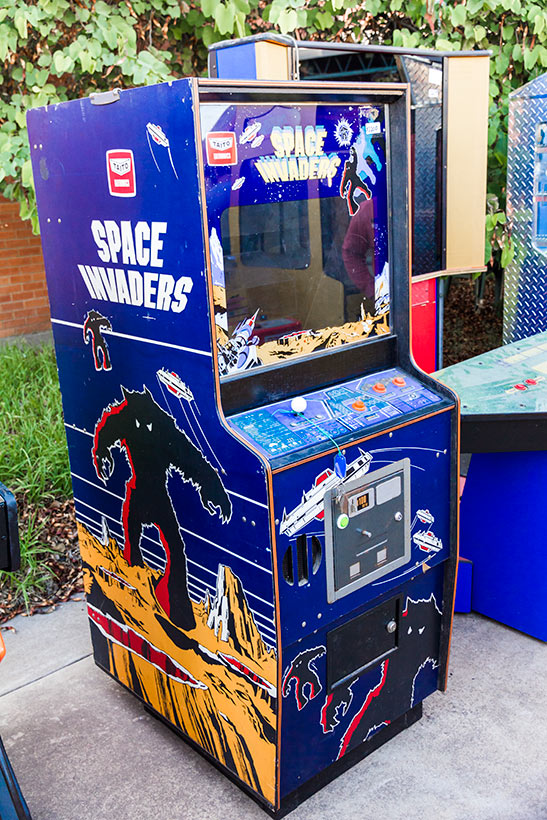
Arcades
Here’s a tip – if you find yourself playing a round of Street Fighter, BlazBlue or Virtua Fighter against a fellow gamer and find yourself getting your arse handed to you on round 1, winning round 2, then getting torn apart in round 3, you actually weren’t amazing in round 2, you were being treated to some local hospitality (thanks Steve at Super Gaijin Ultra Gamer for the tip!). In addition, it’s a bit of a faux pas to take photos or videos in arcades over there (though Wifey took some photos and videos while I was gaming without incident). Just be subtle about it and be aware you’ll be asked to leave if staff catch you. The same goes for video game stores – I would have loved to have taken some video footage and recorded my nerdisms when wandering around Super Potato or Mandarake, but IIRC there are plenty of signs warning that photography is a no-no in shops as well.
Shopping
Customer service is pretty awesome in our experiences. Granted I didn’t understand everything at the checkout since my Japanese is a bit rubbish, but it was at least polite! The handy bit is that most cash registers will display the amount owing in Yen (I’m bad with numbers in Japanese!), but remember to use the little tray they provide to plonk your cash in. The operator will then take the cash, count it back, take the money and put the change in the plastic tray for you to take and you’re good to go.
This leads onto the next shopping bit – go with cash as your primary means of spending where possible. We found most of the 7-Elevens had ATMs that accepted foreign credit cards and we used our travel Visa cards to withdraw cash in chunks as we went through the trip. On a couple of occasions I was caught short (the one I remember most is in Mandarake in Akihabara on the second visit towards the end of the trip, who handily had credit card facilities), but most of the time cash sorted stuff out. The exception to this rule is with hotels (all accepted credit cards) and I’m pretty sure the big department stores will also take credit cards (well, Visa and MasterCards anyways).
Internet access
Wifi access was intermittent when we were over in Japan – some had free wifi, some had limited wifi access, some none. We didn’t have a lot of luck hopping onto hotspots while we wandered around the place, but at the same time internet access was a bit of an optional perk rather than a necessity when we were there.
However, if you want to get online in Japan, some of my friends (thanks Kate and Sly!) have suggested grabbing a pocket wifi device when you get into the country and use that. You’ll get access to Japan’s comparatively excellent (compared to Australia :P) mobile network speed/coverage and since it’s a pocket wifi device you can attach anything with a wifi connection (thus great for consoles, smartphones, tablets and laptops).
… well, that’s it for now. I’ve probably missed some stuff as I’ve gone back and added to this a couple of times already, but it’s been a while since I’ve written on the blog 😛 Hopefully this will mark a more sporadic blogging habit rather than the long awkward pauses over the last few months!