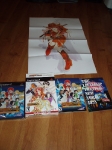
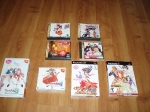
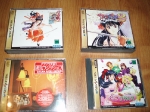
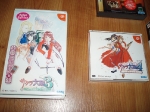
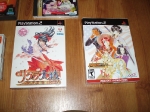
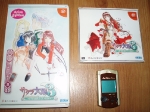
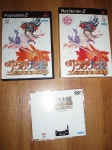
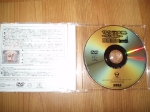
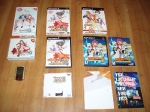
Belated Sakura Wars: So Long My Love gallery

So, NIS released the bilingual Sakura Wars: So Long My Love back in… April? I actually grabbed it on pre-order back then and took a handful of pics to celebrate its release, along with other Sakura Taisen games I have lying about. Full gallery is below, or you can check out the dedicated page as an alternative.

Big update to the Gaming Sessions gallery

Just another quick one – I’ve finally gotten around to updating the metadata (where possible) on the gaming Sessions galleries, including a couple from last year, what I got up to over Easter and some Panzer Dragoon Saga blurry pictures. A number of the images under some of them aren’t recording all the metadata details for whatever reason, but it’s all there.

I’ve recently grabbed a video capture card as well, so this will mean the May 2010 gallery will be the last of the blurry low-res images 🙂 It also means I can capture video footage for future posts. Of course the only source I can’t capture is the arcade cab, but I’m looking at mounting the digital camera on something for future posts for clearer pics without the frantic snaps I usually take between rounds/hadoukens/etc 🙂

As always, everything’s over in the Image Galleries section.

Overhauling the Sega Astro City – Part 5, roundup

Continuing on from part 4 of this series, let’s move on to part 5 – a short summary!

With all the groundwork done, I’ve whipped up a short summary noting my “to-get” list:

Item Comments Price
Terminal block 2x 12-way 30A blocks, dividable $5.70
3m AC cabling For new AC wiring $7.50
General purpose hook up wiring Better quality wiring for general purpose stuff $4.95
New JAMMA adapter Replace existing, tired JAMMA cabling $19.95
Naomi Molex adapters for: (a) male Model 2/3 adapter, (b) male JAMMA, (c) male and female for 12v/GND lines for accessories Naomi molex plugs included with PSU; if can’t get female Naomi molex plugs, run an extra 12v and GND run from each adaptor to a more generic molex, and use that to hook up to a molex off the 12v patch bay $15.00
Molex adapters for chassis and fluro To be determined $15.00
2 x red SPST 12v switch Used to power fan/negatron $7.90
1 x green SPST 12v switch Used to power audio $3.95
1 x 3PDT switch Audio source switch $7.95
2 x 120mm fan guards For protecting against injury on 12v fan $9.90
Negatron Used to obtain -5v on the JAMMA harness $25.00
Stereo audio volume controller Fit to outside to replace current controller, runs off final volume output $21.95

That’s my theoretical list with pricing, which may or may not change over time – these posts are a little retrospective, so more updates will come as they happen. Note that this list doesn’t cover the big purchases, which are the Sun PSU and the chassis from Jomac, this is more the ancillary goods to help get everything together.

Once everything’s been gathered and finalised, I’ll then prepare a project timeline noting what needs to be done in the correct order to remove the old components, fit the new ones, test, and finalise the project. We can only hope there isn’t too much scope creep 🙂

So that’s part 5 – part 6 and onwards will be ad-hoc updates, so to keep track of the whole project, just use the Sega Astro City Overhaul tag, as the whole series will be added to it over time.

Overhauling the Sega Astro City – Part 4, PC addition

Continuing on from part 3 of this series, let’s move on to part 4 – adding a PC to the cab.

This one came as a bit of an afterthought, but after upgrading my old workhorse S478 P4 3.2ghz PC, I thought it would probably be fine getting relegated to the cab. The cost adding this functionality is pretty minimal, as I still have the valid XP license and the video card’s an ATi Radeon, which have good rates of success running Soft15k. All I’ll need is a J-PAC, and I’ll be fine.

To simplify the procedure, I’ll keep the network card in the machine and administer the PC over the network, and run a customised nLite install to trim out all the unnecessary gear. I’ll rig a momentary push-button to take care of powering on the PC with one of the spare slots I have under the CP (or I’ll add it to the project box housing the switches for the fans, negatron, etc) and mount the PC inside the cab. Easy. I’ll have to customise the gamelist to suit the hardware and monitor since I’m only after 15k titles, but it shouldn’t be too tricky. As a bonus, it also means I can use my recently acquired XM1541 adapter to run off the machines LPT port since my new desktop PC lacks that kind of hardware.

So that’s part 4 – part 5 will note the summary, and the posts thereafter will be ad-hoc updates.

To keep track of the whole project, just use the Sega Astro City Overhaul tag – the whole series will be added to it over time.