Overhauling the Sega Astro City – Part 10, mounting the MAME PC
I’ve talked before (here and here) on the MAME PC I’ve worked on as part of this project – today I have some images to show how I set it up.
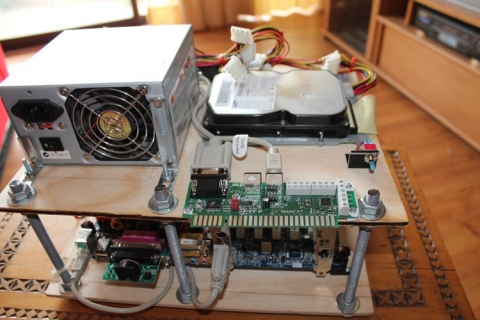
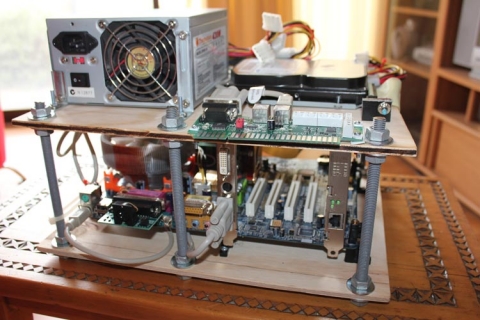
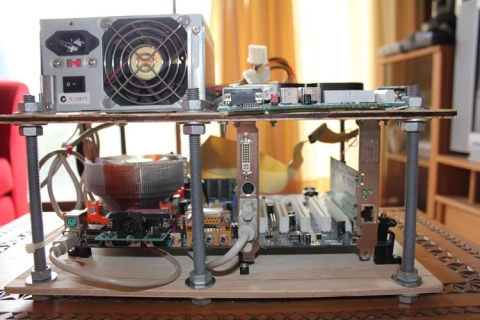
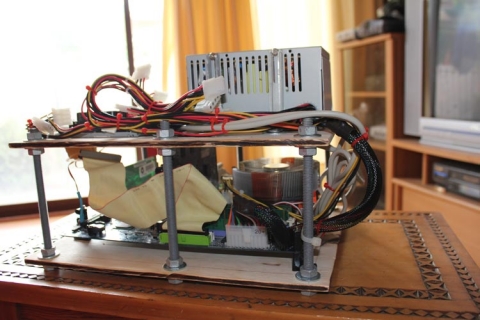
The aim was to have the PC mounted in a way that would easily allow me to swap it in/out of the cabinet like a PCB. To do this, I therefore needed to have it mounted on something, and due to the size of the chamber in the Astro City, I also needed to take space into account. I actually got the idea from some ghetto DIY arcade sticks I’d seen on the net, and I have to say I’m pretty happy with the end result.
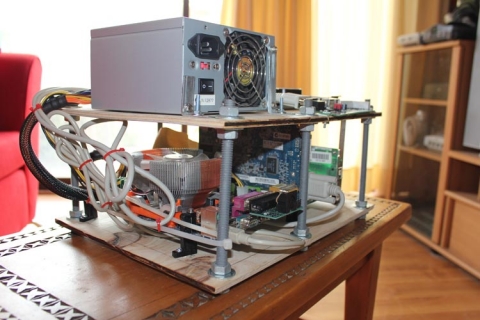
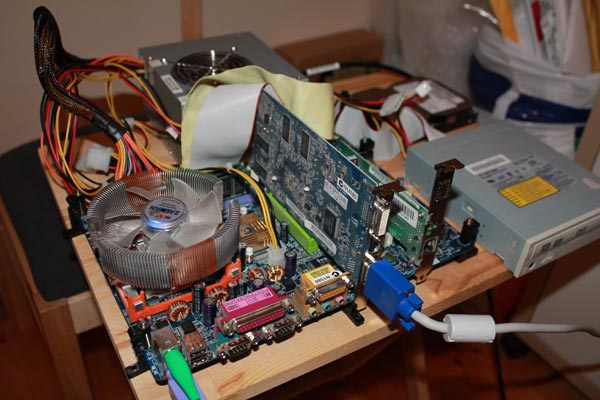
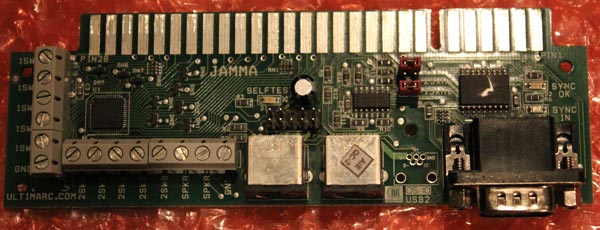
It’s made up from a slab of MDF that I cut to size just slight larger than the motherboard with the mounting legs, with some extra give on the side where the accessories (graphics card, etc) stick out to allow for space for VGA adapters. The motherboard is propped up on PCB legs and screwed into the MDF to hold it in place. The top layer where the PSU, HDD and JPAC sit actually has two 80mm holes cut in a figure-8 shape that allows the CPU cooler to vent into the PSU and then have the PSU exhaust the air. To insulate the JPAC, I grabbed an old plastic VHS tape case and cut it to shape the JPAC with a rotary tool and that’s placed between the JPAC and the MDF. Small squares were then cut to act as plastic washers for the bolts so that the JPAC’s PCB wasn’t damaged when bolted down.
The poles supporting the structure were actually one long screw rod I got from the hardware store with an M10 width. Appropriate nuts and washers bind it for each layer, and I simply cut it to the necessary sizes using my angle grinder.
Everything was sized up, and bolts secure all the pieces of the setup, including cards in the motherboard, the PSU, JPAC and HDD. All the cables are secured using cable ties. The power button is routed to a DP3T switch I had lying around – simply flick it up, and it mimics the use of a power button.
All up, it works well, even if it is probably a bit rough 🙂 I like it though!
As noted before, posts on the refurb are being done ad-hoc, so to keep track of the whole project, just use the Sega Astro City Overhaul tag, as the whole series will be added to it over time.
